Thursday, September 28, 2023

Something Wicked-Layered Monster Card

 Hi everyone.  I have a Monsters card to share with you today from A Colorful Life Designs September Release.  Use code VonFan10 to save on your purchases.


I used the Layered Monsters Stencil.  It consists of 3 stencils. 1 for the body, 1 for the face, and 1 for the eyes.  They are labeled for you. Super fun.  I chose white cardstock and ink blended the Monster bodies in Hero Hues Lime Fizz, Hero Hues Berry Smoothie, and Hero Hues Azalea ink.  For stencil 2, I used Hero Hues Lemon Drop ink for the Monster's Face.  And for stencil 3 I used Black Soot Distress Oxide ink. I then ink blended around my Monsters with Black Soot Distrss Oxide ink.


I cut out my Monsters with a rectangle die and glued it to a A2 card base.  I glued some Googly eyes on one of my Monsters for fun and glued a Halloween Tim Holtz Chipboard Sentiment.  I hope you like my card.  It was fun to layer to make this card.  

Supplies:

Layered Monsters Stencil


Layered Monsters Stencil

Affiliate Links have been added but of course no extra charge to you. 

I appreciate your support.  It means a lot.


Wednesday, September 27, 2023

Woodblock Wednesday Guest Designer

 Hello everyone.  I hope you are doing well today.  I'm super excited to be guest designing for Woodblock Wednesday blog today hosted by my friend Amy Tsuruta.


Here is what I created:


I was one of the lucky winners from last months Woodblock Wednesday yay.  I won a giveaway Create your own Calendar Pages.  Thank you Amy.


So for January, I grabbed a Snowflake woodblock Stamp from my bin and stamped a bunch on the page in Lawn Fawn grape jelly ink.  For February, I grabbed this heart border woodblock stamp and stamped it in black ink. I was so afraid to mess up as there is 1 page per month.  I colored the heart border in with my Prismacolor Colored Pencils which was nice. I need to use those more often.  I ink blended around my heart border with some Stormy Sky Distress Oxide ink.


Next, for March I stamped a springish Bicycle woodblock stamp that has flowers I colored it in with colored pencils and ink blended some spring colors around it. Distress inks in Squeezed Lemonade Oxide ink, Picked Raspberry Distress Oxide ink, Lawn Fawn Grape Jelly, and Stormy Sky Distress Oxide ink. Lastly, it was April's turn. I used a bunny woodblock stamp and stamped it with black ink and again colored with my colored pencils. I took some Squeezed Lemonade Distress Oxide ink and ink blended around my bunny. You can add sentiments. I did think about it, but I decided to keep it simple. That finishes off my 4 months for next year.  I now need to finish the rest of the months. Maybe 4 at a time? I hope you like them. I have had these woodblock stamps for a while except the snowflake one I got that one last year I think I bought it from Joanns.
 Thank you so much Amy for my calendar.  I had a  lot of fun and Thank you for having me guest design.


Tuesday, September 26, 2023

S'mores-The S'more The Merrier

 Hi everyone.  I have a S'mores card for you.  It might make you want to go buy some supplies to have a S'mores night. Just Sayin' I used A Colorful Life Designs New Stencil and stamp for my card today.  Also don't forget to use my code VonFan10 to save 10% off your purchase.


Isn't this a fun card? Do you want some S'mores?  I used the New Campfire stencil with white cardstock.  On this stencil, you get the fire and logs and stick with marshmallow.  So cool.  I ink blended the fire and logs first with Lawn Fawn Crunchy Leaf ink, Ground Espresso Distress ink, Lumberjack Plaid Distress Oxide ink,  and Carved Pumpkin distress Oxide ink.  I then laod my stencil down to place my stick and marshmallow near the fire and ink blende Lost Shadow Distress ink and Ground Espresso Distress ink 2 times.  I then used Chipped Sapphire Distress Oxide and ink blended my white space carefully.  I flicked some festive Berries and Picket Fence Distress Spray over my background.  I love how it came out.


Next, I cut out my background with a A2 scalloped rectangle die.  I stamped and embossed a sentiment on red cardstock from the New S'mores Stamp with white ink and white embossing powder.  I cut my sentiment with a banner die.  I then glued my rectangle panel to a A2 card base and applied my sentiment with foam tape.  I embellished my card with some red liquid dots.  I hope you like my card.  I had fun making it.  

Until Next Time, Happy Crafting!

Supplies:

Campfire Stencil

S'mores Stamp Set

Affiliate Links have been added but of course no extra charge to you.  

I appreciate your support.  It means a lot.


Wednesday, September 20, 2023

Layered Candy Corn

 Hi everyone.  I have a fun card today.  I used a New Stencil and stamp set from A Colorful Life Designs Newest Release.  Use VonFan10 to save 10% off your purchase when shopping. You can watch my video here


I thought it would be fun to use non traditional colors for these Candy Corn.  There are 3 stencils included.  I googled Candy Corn and seen a photo of Easter Candy Corn using similar colors.  That was my motivation.  I used Picked Raspberry Distress Oxide ink, Mowed Lawn Distress Oxide ink, Squeezed Lemonade Distress Oxide ink, Villanous Poison ink Distress ink, and Lost shadow Distress.   ink on white cardstock.  I ink blended lightly and I love how it came out.


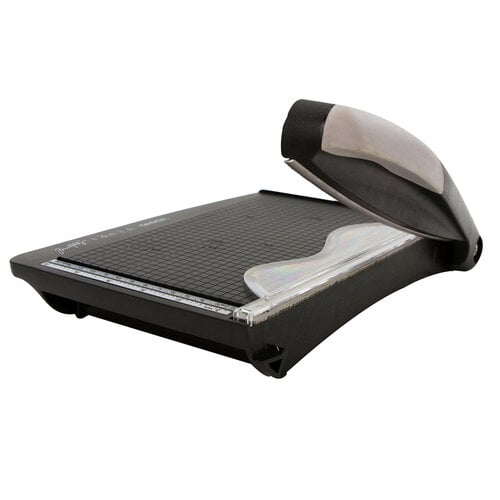
Next, I cut my panel to a A2 size using my paper trimmer.  I stamped and masked a sentiment from the New S'mores Stamp set with black ink.  I cut my sentiment using my paper trimmer.  I stamped a secondary sentiment onto my panel from a stamp in my stash.  I glued my panel to a  A2 card base.  I attached my first sentiment with foam tape and glued some sequins.  I hope you like my card.  It was so much fun.  I love non traditional cards especially candy ones.  Shop here for the Newest Release

Until Next Time, Happy Crafting!

Supplies:

Layered Candy Corn Stencil

Layered Candy Corn Stencil

S'mores Stamp Set

S'Mores Clear Stamp Set

Affiliate Links have been added but of course no extra charge to you.  

I appreciate your support.  It means a lot.


Sunday, September 17, 2023

Kitty Birthday Card

 Hello everyone!  I have a Kitty Birthday Card Video on the Kat Scrappiness YouTube Channel using New Products from Kat Scrappiness's Newest Release.  You can watch my video here


I love how this cute Mini Slimline card came out.  I used the New Kitty Chasing Butterflies Die and some New Glitter Paper from the New Kat Scrappiness Release.  I cut out my kitty with white cardstock and ink blended it with Lost Shadow Distress ink using my Pink Glitter brush tool.  (A New Favorite)  I then cut out my butterflies using the New Blue Glitter Paper pack.  I like the 2 sizes of the butterflies.  I also used a Mini Slimline Wonky Stitched die to cut out my background.  I chose a light purple from the New Purple Glitter paper pack.


Next, I cut out some glitter paper from the Autumn Glitter paper pack for my ground for my kitty.  I stamped and heat embossed my sentiments from the Happy Day Stamp set on black cardstock with White embossing powder.  I then fussy cut my sentiments.  I glued everything to a coordinating card base and I used the Graveyard Shift Sprinkle mix for the Clay Flowers on my card which I thought was perfect.  I hope you like my card and video.  It was a lot of fun.

Supplies:

Kitty Chasing Butterflies Die

Purple Glitter Paper 6x6

Blue Glitter Paper 6x6

Autumn Glitter Paper 6x6

Pink Glitter Ink Blending Brushes

Embossing Tool

Graveyard Shift Sprinkle Mix

Reverse Tweezers Rainbow Ombre 

Mini Slimline Wonky Stitched Dies

Happy Day Stamp

Embellishment Tray Pink

Affiliate Links have been added but of course no extra charge to you when you use my links.

Thank you so much for your support, I appreciate it.


Saturday, September 16, 2023

BYSHC Sketch Challenge 37

 Hi everyone.  I have another Holiday card for BYSHC Sketch 37 today.  This is such a fun sketch and I think you will find it easy too.  It makes a great design for your holiday cards.  

Sketch 37


On my card for the Sketch 37,  I chose to cut out some pattern papers from a old Christmas 12 x 12 Recollections Paper pack from Michaels.  Cutting my pattern paper using my paper trimmer according to the sketch was easy I think.  I hope you find it easy too.


I also used some Tim Holtz Christmas Ephemera to use as my elements to complete the sketch. I glued everything to a A2 card base.  So easy.  I hope you like my card.  I think I will be making more cards using this quick and easy sketch.  You can also win a prize just upload your card to the BYSHC FB group you have until September 31, 2023.

Until Next Time, Happy Crafting!


Friday, September 15, 2023

Classic Snowflakes Mid Month Motivation

 Hi everyone.  I have some Mini Slimline Cards to share with you using the New Mid Month New Motivation Stencil from A Colorful Life Designs called Classic Snowflakes Stencil.  What is Mid Month Motivation you ask?  You can get this New Stencil Classic Snowflakes at a discounted price $4.00 and you can use my code too to save even more so Use VonFan10 to save 10% off your total purchase.

Classic Snowflakes Stencil

Classic Snowflake Stencil


On my first Mini Slimline Card, I used the New Mid Month Motivation Stencil on white cardstock with Milled Lavender Distress Oxide ink, Spun Sugar Distress Oxide ink, and Prize Ribbon Distress Oxide ink.  I love these colors of ink together using this Holiday Stencil.  I cut out my background using a Simon Says Stamp Mini Slimline die.  I flicked some Metallic Silver paint onto my background. I love how it looks. Next, I stamped and colored these cute snowman from Simon Says Stamp Warmest Wishes Stamp Set and then fussy cut them out.  I also stamped a sentiment and fussy cut it out.  I glued everything to a Mini Slimline card base and added the sentiment with foam tape.  I also added some liquid drops to match.


On my last card here, I ink blended my white cardstock first and then used the New Classic Snowflakes Stencil with the same colors and then ink blended the snowflakes using the stencil.  I then flicked some metallic silver paint over my background.  So pretty. I love how both cards came out.  I also cut this background out with the same Mini slimline Card base.  I stamped and colored some more snowman and fussy cut them out.  I stamped another sentiment and fussy cut it out.  I glued everything to a Mini Slimline card base and added my sentiment with foam tape.  I added some more liquid drops and that finishes my cards.  I hope you like them.  They were so much fun.  I hope you grab the stencil too, it's a great one to use for your Holiday cards..  Shop Here.

Until Next Time, Happy Crafting!

Supplies:

Classic Snowflakes Stencil

Simon says Stamp Warmest Wishes Stamp

Simon says Stamp Mini Slimline Dies

Affiliate Links have been added but of course no extra charge to you. 

I appreciate your support.  It means a lot.


Wednesday, September 13, 2023

Artichoke Miss You

 Hi everyone.  I have a card to share with you today using a New Stencil from A Colorful Life Designs.  Use VonFan10 to save 10% off your purchase.  Coupon Code cannot be combined with Master Creator Bundle.


On my card today, I used the New Artichoke Rose Stencil.  It's a Beautiful Stencil and I was so happy to use it. Artichokes remind me of my mom.  There is a Rose on this stencil that you can ink blend I only ink blended some flowers with Picked Raspberry Distress Oxide ink. I mostly wanted the Artichoke this time for my card. My mom grew up where Artichokes were harvested.  On white cardstock, I ink blended with Mowed Lawn Distress Oxide ink and Rustic Wilderness Distress Oxide ink.


I cut out my background with a A2 Stitched Rectangle die.  I then flicked some Picked Raspberry distress Oxide ink and some green metallic paint.  I glued my panel to a A2 card base and added a pre-made foiled sentiment with a foam strip.  I then glued some green sequins to match.  I hope you like it.  It was so much fun to make and feels special as it reminds me of my mom who I miss deeply.

Until Next Time, Happy Crafting!

Artichoke Rose 6x9 Stencil

Affiliate Links have been added but of course no extra charge to you. 

I appreciate your support.  It means a lot


Monday, September 11, 2023

Sending Holiday Cheer

 Hi everyone. I have a Holiday card to share today using the New Release from Sweet 'n Sassy Stamps.  In this Release there are so many wonderful Holiday stamps and sentiments to mass produce your cards quickly and beautifully.


On my card, I used the New Holiday Cheer Stamp Set illustrated by Julee Tilman.  I love this stamp so much.   I stamped the cups on white cardstock with black alcohol friendly ink and colored the Poinsettia Cups with my copic markers.  I then fussy cut the cups out using my scissors.


I cut out some red cardstock from a A2 paper pack.  I cut it down smaller than A2 to be 4 x 5.25.  I then glued my red cardstock to a white A2 heavy weight card base.  I rearranged my cups and glued them to my card.


I stamped a sentiment from the stamp set on white cardstock and cut it out with my paper trimmer.  I then layered my sentiment on some aqua paper to match.I then glued my layered sentiment to my card.  Lastly, I glued some pearls and added some white gel accents with my Gelly Roll Pen.  I hope you like my card.  I had so much fun making it.  I love Coffee and Tea so these kinds of cards make my heart happy.

Until Next Time Happy Crafting!

Supplies:

Holiday Cheer Stamp

Pinkfresh Studio Matte Silver Pearls

Scrapbook.com Christmas A2 Paper Pack


Affiliate Links have been added but of course no extra charge to you.

  I appreciate your support.  It means a lot.


Friday, September 8, 2023

Halloween Ghosties

 Hi everyone.  I have a Halloween card today using a New Stencil from A Colorful Life Designs Newest Release.  Use VonFan10 to save 10% off your purchase except Master Creator Bundles those are already marked down 20% off.


I used the New Interactive Drippy Ghosts Stencil.  This stencil also come with the negative pieces.  It has the ghosts, dripps, and ghost faces. I think the faces are so fun.  It's a really neat stencil to own.  I used white cardstock and ink blended the drippy part with Spun Sugar Distress Oxide ink and the ghosts with Black Soot Distress Oxide ink.  For the ghost faces I used Black Soot Oxide ink again but with a heavier hand.


Next, I cut out my cardstock with a rectangle die.  I stamped a sentiment from a Trinity Stamps sentiment stamp set.  I then glued my card panel to a A2 black card base and glued some sequins.  I hope you like my card.  It was really fun to make.  I love Halloween crafting.  Check out the New Release here

Until Next Time, Happy Crafting!

Supplies:


Affiliate Links have been added but of course no extra charge to you.  

I appreciate your support.  It means a lot.


Monday, September 4, 2023

S'mores Gooey and Sweet

 Hi everyone.  I have a fun card to share using a fun New stamp and Stencil from A Colorful Life Designs New Release.  Use VonFan10 to save 10% off your purchase.


Do you love S'mores?  I think they are a delicious and fun dessert. This New S'mores Stencil and stamp is so much fun.  I started off with white cardstock and I placed my s'mores stencil over it.  I began ink blending and building my S'more with Lawn Fawn Crunchy Leaf ink for the Graham cracker, Ground Espresso Distress ink for the Chocolate and dots on the Graham cracker, and Lost Shadow Distress ink for the Marshmello.  I decided to make a few more.  It would be fun for a Slimline card too.


I cut out my card with a rectangle A2 die.  I then used the New S'mores stamp and stamped my sentiment in brown ink on my panel.  It reads "Gooey and Sweet what a treat". I then stamped the marshmallows with faces in black ink.  I flicked some white paint splatters onto my panel and added some sequins.  I then glued my panel to a A2 card base.  I hope you like my card.  I had so much fun making it.  Check out the New Release here.

Supplies:

S'mores Stamp

S'Mores Clear Stamp Set

S'mores Stencil

S'Mores Stencil


Affiliate Links have been added but of course no extra charge to you.  

I appreciate your support.  It means a lot.


Saturday, September 2, 2023

Pumpkins

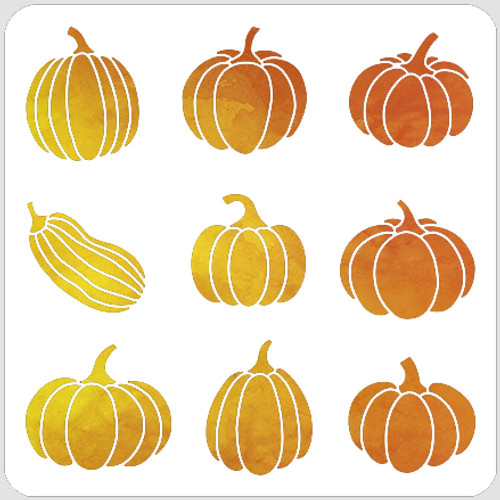
 Hi everyone.  I have a Fall card today using the New Lots Of Pumpkins Stencil from A Colorful Life Designs New Release. Use VonFan10 to save 10% off your purchase.


I love this new stencil Lots of Pumpkins.  I chose to mix and match the pumpkins and I chose some fun non traditional colors.  On white cardstock, I chose Picked Raspberry Distress Oxide ink, Milled Lavender Distress Oxide ink, Bundled Sage Distress Oxide ink, Salty Ocean Distress Oxide ink, and a brown ink for the stems.  I love how soft they are.  I will have to try the traditional colors for my next card.


I cut my background to a A2 size with a double stitched rectangle die and stamped a sentiment from a retired stamp set from Taylored Expressions with black ink.  I glued my panel to a A2 card base and embellished with a puffy bow and pearls.  I hope you like my card.  I had fun making it.  Check out the New Release hereMaster Creator Bundle marked down 20% off cannot be combined with any other coupon.

Supplies:

Lots of Pumpkins Stencil


Lots of Pumpkins Stencil


Affiliate Links have been added but of course no extra charge to you. 

I appreciate your support.  It means a lot.


Friday, September 1, 2023

Sunflower Scroll

 Hi everyone.  It's September which means A Colorful Life Designs has a brand New Release today. I have a video today you can watch here using the New Sunflower Scroll Stencil.

Lots of New Stencils and a New Stamp Set. So super exciting.  Use VonFan10 to save 10% off your purchase.


Master Creator Bundle


This is such a beautiful stencil and I love Sunflowers.  I used  the New Sunflower Scroll Stencil and ink blended Mustard Seed Distress Oxide ink on black cardstock.  I used Ground Espresso Distress ink for the centers of the sunflowers.  I did ink blend with a heavy hand because I chose black cardstock.  


I also used Prismacolor Pencils in the nooks and crannies and I love how my card came out using this stencil.  I used pencils in 916, 945, and 938.  Next, I cut my cardstock with a Tim Holtz deckle torn trimmer and made my panel squared.  I then  glued it to a card base.  I glued a foiled sentiment strip premade from my stash from Ellen Hutson.  I then added some gold confetti sprinkles.  I hope you like my card.  Check out the New Release here.

Supplies:

Sunflower Scroll Stencil

Tim Holtz Deckle Torn Trimmer

Tonic Studios - Tim Holtz - Deckle Torn Edge Trimmer

Affiliate Links have been added but of course no extra charge to you. 

I appreciate your support.  It means a lot.


BYSHC Sketch Challenge #37

 Hi everyone.  BYSHC has a New Sketch Challenge #37 for September.  This is a really fun sketch and I'm sure you'll love it for your Holiday cards.

Sketch 37


I chose to use some Christmas pattern paper from some 12x12 paper packs from Michaels Recollections.  I cut my pieces according to the sketch.  I chose to use some Tim Holtz Ephemera The Santa and Sentiment.  I added a scalloped circle for my circle element.


I glued everything to a A2 card base.  I then used some Mowed Lawn distress ink and ink blended my foiliage pattern paper.  I love the Vintage look of this card.  I hope you like it.  Sometimes it's nice to use ephemera and pattern paper from your stash.  You have all month to join the challenge, I can't wait to see your cards.

Entries must be added to the challenge album in the Build Your Stash Holiday Cardmakers Facebook group to be eligible for a prize. The winner will be chosen randomly from the entries and announced in the Facebook group. Join in the fun and start building your stash of holiday cards now. Can't wait to see what you all create!


I Chews You

 Hello everyone.  I have a card to share using A Colorful life Designs New May Release.  If you love to make cat or dog cards then this mont...