Showing posts with label Christmas. Show all posts

Tuesday, December 19, 2023

Merry Christmas Poinsettia Card

 Hello everyone.  I have a Holiday card to share using Sweet 'n Sassy Stamps.  I had so much making this card and I plan to give  it to our friend April who is bringing us some Homemade Cookies. She always makes so many different kinds.  My favorite is the Magic Coconut Bars...Yum.


I went for a pinkish Holiday Card.  I love how it came out.  I used pink heavy weight cardstock 110lb. panel 4 x 5 1/4.  I placed my cardstock in my misti stamping platform and used the Poinsettia Wishes Stamp set.  I used Lawn Fawn Plastic Flamingo dye ink for the flowers and I inked up the leaves with Catherine Pooler Deck The Halls Dye ink.  I used Versafiene Nocturne ink for the centers and I scattered some of the centers on my card.  I also stamped the sentiment on my panel too.  I have used this sentiment a lot for my Holiday Cards. I love the font so much.


Next, I glued my panel to a green heavy weight A2 Card Base.  I added some sequins and that finishes this card.  I had a lot of fun making it and it was really easy too.  I hope you like it.

Thank you for taking a Peek.

Supplies:

Poinsettia Wishes Stamp

Poinsettia Wishes Stamp and Die Bundle

Catherine Pooler Deck The Halls ink

Lawn Fawn Plastic Flamingo ink


Affiliate Links have been added but of course no extra charge to you.  

I appreciate your support.  It means a lot.


Monday, October 16, 2023

Layered Gingerbread Men

 Hello everyone.  I have a fun Holiday card to share using a New Layering Stencil and Stamp set from A Colorful Life Designs New October Release.  Use VonFan10 to save 10% off your purchase.


On my card today, I used the New Layered Gingerbread Stencil.  It consists of 2 stencils.  One stencil is the body and the other is the face and buttons.  I started out with pink cardstock and ink blended stencil 1 with Catherine Pooler All Over Coffee ink.  For stencil 2, I ink blended the face with Black Soot Distress Oxide ink and Picked Raspberry Distress Oxide ink for the buttons.  I then flicked some white paint onto my background.


I cut out my background to be smaller than A2 4 x 5.25.  I then stamped the sentiment onto my panel from the ne Spread Love Stamp with black ink.  I glued my panel to a darker pink A2 card base and glued some sequins.  I hope you like my card.  It was a lot of fun.  

Supplies:

Layered Gingerbread Men Stencil

Spread Love Stamp

Affiliate Links have been added but of course no extra charge to you. 

I appreciate your support.  It means a lot.


Friday, October 13, 2023

Cat Charistmas Card

 Hello everyone.  I'm participating in a Cat Lovers Christmas Challenge Hop Linky PartyKat Scrappiness is a Sponsor and I had fun using some Kitty products to make this Christmas Card.  This Challenge is a special one as we are also remembering Janis who hosted this hop and sadly passed away.


On my card, l used The Kat's Meow paper Pad 6x6, 6x6 Fish Bones Stencil, Pawsome Cats Stamp Pawsome Cats Die Set. Pawsome Cats Sentiments stamp, Reindeer Games Sentiments Stamp, Everyday quokka Stamp, Everyday Quokkas Coordinating Die.Never Ending Oval Dies, and Embossed Edge Reckatangle dies.  I embellished with Sparkling Poinsettia Sprinkle Mix.

I started out with white cardstock, I ink blended the Fish Bone Stencil with Festive Berries Distress Oxide ink using my Glitter  blending brush Tool. I then cut it out with the largest A2 rectangle die. I stamped and heat embossed my cat from the Pawsome Cats Stamp set and the accessories from Everyday Quokka Stamp with black ink and clear embossing powder and colored them in with my copic markers.  I then cut them all out with the coordinating dies.


I cut some pattern paper from The Kat's Meow paper pack with the Oval die to look like a rug and my cat is happy and relaxing with his festive scarf, hat, mouse toy, and present.  I stamped 2 sentiments one from the Pawsome Stamps Sentiments stamp and the other from the Reindeer Games Sentiments Stamp set. I cut my sentiments to fit my card.   I glued everything to a A2 card base and added some embellishments from the Sparkling Poinsettia Sprinkle mix.  Lastly, I added some white gel accents with my Gelly Roll white pen.  I hope you like my card.  It was so fun to make using Kat Scrappiness products.

Supplies:

Pawsome Cats Stamp

Pawsome Cats Dies

Pawsome Cats Sentiment Stamp

Never Ending Oval Dies

Fish Bones Stencil 6x6

The Kat's Meow Paper Pack 6x6

Reindeer Games Sentiment Stamp

A2 Embossed Edge Rectangle Dies

Sparkling Poinsettia Sprinkle Mix

Purple Glitter Blending Brush

Everyday Quokka Stamp

Everyday Quokka Die

Affiliate Links have been added but of course no extra charge to you.

  I appreciate your support.  It means a lot.


Monday, October 9, 2023

It's A Wonderful Wintery Day!

 Hi everyone.  I have a Snowman card today using a New Stencil from A Colorful Life Designs Newest Release.  Use VonFan10 to save 10% off your complete order.  


Isn't this Snowman cute?  I used the New Cheery Snowman Stencil.  On white cardstock I used inks Black Soot Distress Oxide, Pine Needles Distress Oxide, Carved Pumpkin Distress Oxide, Ground Espresso Distress ink, Candied Apple Distress ink, and Mustard Seed Distress Oxide ink.  I did shift my stencil over and applied Aquatini ink by Catherine Pooler for the snowflakes.


I cut my background and glued it to a A2 pattern paper that looks like gold glitter.  I glued a sentiment from my stash and glued some gold gems. I also used a copic marker R20 for some cheeks on my snowman. I hope you like my card.  It was so much fun and makes me smile.

Supplies:

Cheery Snowman Stencil


Affiliate Links have been added but of course no extra charge to you. 

I appreciate your support.  It means a lot.


Sunday, October 1, 2023

Beautiful Poinsettia Stencil-A Colorful Life Designs

 Hello everyone.  Happy October 1st.  A Colorful Life Designs has a New Release today.  I used the New Beautiful Poinsettia and Spread Love Stamp set on my video today.  Use VonFan10 to save 10% off your purchase.


Watch my video here


I started out with off white cardstock cream like.  I placed my stencil over and ink blended with Catherine Pooler's Tutti Fritti ink for the red, and Tiara for the yellow center.  I then flicked some gold paint splatters onto my background.


I then cut my panel to 4 x 5.5 inches.  I stamped my sentiment with my Misti Stamping Platform and stamped a sentiment from the New Spread Love Stamp with Versafine black ink.  I glued my panel to a gray A2 card base and added some gems from Pinkfresh Studio.  That finishes my card, I hope you like it.


Here is my card I made on my video:


Supplies:


Affiliate Links have been added but of course no extra charge to you. 

I appreciate your support.  It means a lot.


Saturday, September 16, 2023

BYSHC Sketch Challenge 37

 Hi everyone.  I have another Holiday card for BYSHC Sketch 37 today.  This is such a fun sketch and I think you will find it easy too.  It makes a great design for your holiday cards.  

Sketch 37


On my card for the Sketch 37,  I chose to cut out some pattern papers from a old Christmas 12 x 12 Recollections Paper pack from Michaels.  Cutting my pattern paper using my paper trimmer according to the sketch was easy I think.  I hope you find it easy too.


I also used some Tim Holtz Christmas Ephemera to use as my elements to complete the sketch. I glued everything to a A2 card base.  So easy.  I hope you like my card.  I think I will be making more cards using this quick and easy sketch.  You can also win a prize just upload your card to the BYSHC FB group you have until September 31, 2023.

Until Next Time, Happy Crafting!


Monday, September 11, 2023

Sending Holiday Cheer

 Hi everyone. I have a Holiday card to share today using the New Release from Sweet 'n Sassy Stamps.  In this Release there are so many wonderful Holiday stamps and sentiments to mass produce your cards quickly and beautifully.


On my card, I used the New Holiday Cheer Stamp Set illustrated by Julee Tilman.  I love this stamp so much.   I stamped the cups on white cardstock with black alcohol friendly ink and colored the Poinsettia Cups with my copic markers.  I then fussy cut the cups out using my scissors.


I cut out some red cardstock from a A2 paper pack.  I cut it down smaller than A2 to be 4 x 5.25.  I then glued my red cardstock to a white A2 heavy weight card base.  I rearranged my cups and glued them to my card.


I stamped a sentiment from the stamp set on white cardstock and cut it out with my paper trimmer.  I then layered my sentiment on some aqua paper to match.I then glued my layered sentiment to my card.  Lastly, I glued some pearls and added some white gel accents with my Gelly Roll Pen.  I hope you like my card.  I had so much fun making it.  I love Coffee and Tea so these kinds of cards make my heart happy.

Until Next Time Happy Crafting!

Supplies:

Holiday Cheer Stamp

Pinkfresh Studio Matte Silver Pearls

Scrapbook.com Christmas A2 Paper Pack


Affiliate Links have been added but of course no extra charge to you.

  I appreciate your support.  It means a lot.


Friday, September 1, 2023

Sweet n' Sassy Stamps New September Release

 Hi everyone.  I'm so excited Sweet 'n Sassy Stamps has a Brand New Release today.  Today, I'm sharing one of the cards I created for the New Release.  And it's a Holiday Themed Release!


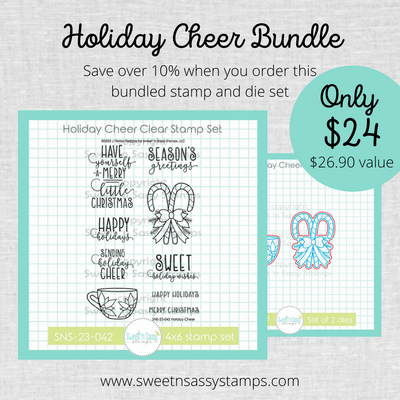
Aren't these Candy Canes Pretty?  I used the New Holiday Cheer Stamp set illustrated my Julee Tilman.  I love Julee's Stamps and this set has a coffee/tea cup and some beautiful sentiments with different fonts.  I know you will love it.  I chose to stamp this candy can on Neenah Solar White cardstock.  I colored it in with my copic markers and fussy cut it out.  There is a coordinating die set at Sweet n' Sassy Stamps.  


Next, I printed some tags from the Gnomie Christmas Digital stamp on red cardstock.  I fussy cut it out.  I grabbed some greenish cardstock and stamped the candy canes in Catherine Poolers ink all over my panel. It was really fun.  I then cut my cardstock to be 4 x 5.25.  I tied some Christmas twine on my tag.  


I stamped a sentiment from the stamp set with black ink on white cardstock and cut it out with my paper trimmer.  I glued everything to a A2 card base and I popped up my sentiment with foam tape.  I used a white gelly roll pen for accents and glued some gold baubles.  That finishes my card.  I hope ypu like it and check out the new release here.  I will be back sharing what I created for the New Release.

Supplies:


Holiday Cheer Stamp & Die Bundle


Holiday Cheer Clear Stamp Set


Holiday Cheer Die Set


Affiliate Links have been added but of course no extra charge to you. 

I appreciate your support.  It means a lot.


Another Holiday Card for {BYSHC} Sketch #72

 Hello everyone I have another Holiday card for {BYSHC} Card Sketch 72 .  Lawn Fawn is our sponsor this month yay. This is such a fun card s...