Showing posts with label Fall. Show all posts

Wednesday, October 4, 2023

A Halloween card

 Hello everyone.  I'm back with a Halloween card using a New Stencil from A Colorful Life Designs New October Release.  Use VonFan10 to save 10% off your purchase.


I thought this stencil was so much fun and I just love circles.  This stencil is called Circle Shadow Stencil.  I chose to watercolor it and it was so relaxing.  I used White watercolor cardstock from Taylored Expressions.  I then placed my stencil over my cardstock with tape to hold it in place.  Use tape that won't rip your cardstock, ask me how I know? The paints I used are from  Prima Art Philosophy watercolor confetti set.  I used Papaya, Lime Green, Purple and Black.  Once my cardstock was dry I cut my background to 4 x 5.25.  I love how some circles are messy.


I used a fun retired Halloween Stamp from Picket Fence Studios called If The Broom Fits.  I used a black ink and stamped some of the images on my panel.I think it's fun.  And what a change since I have been making a ton of Christmas Cards.  I then glued my panel to a gray A2 card base.  I added some embelishments and that finishes my card.  I hope you like it!  I hope you grab this stencil, there is a square one too.  I made a snowman card with it, you might have noticed it.  Check out the New Release here and grab the Master Creator Bundle here

Supplies:

Circle Shadow Stencil


Affiliate Links have been added but of course no extra charge to you. 

I appreciate your support.  It means a lot.


Saturday, September 2, 2023

Pumpkins

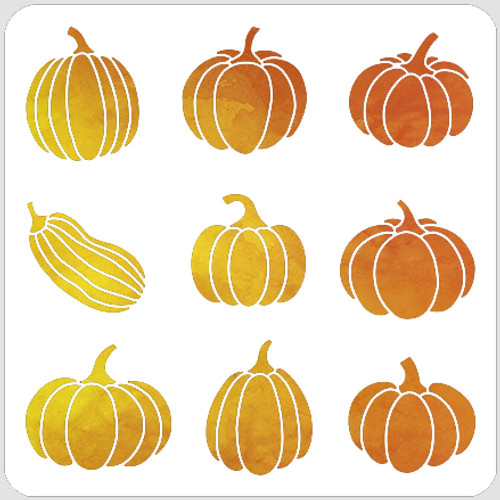
 Hi everyone.  I have a Fall card today using the New Lots Of Pumpkins Stencil from A Colorful Life Designs New Release. Use VonFan10 to save 10% off your purchase.


I love this new stencil Lots of Pumpkins.  I chose to mix and match the pumpkins and I chose some fun non traditional colors.  On white cardstock, I chose Picked Raspberry Distress Oxide ink, Milled Lavender Distress Oxide ink, Bundled Sage Distress Oxide ink, Salty Ocean Distress Oxide ink, and a brown ink for the stems.  I love how soft they are.  I will have to try the traditional colors for my next card.


I cut my background to a A2 size with a double stitched rectangle die and stamped a sentiment from a retired stamp set from Taylored Expressions with black ink.  I glued my panel to a A2 card base and embellished with a puffy bow and pearls.  I hope you like my card.  I had fun making it.  Check out the New Release hereMaster Creator Bundle marked down 20% off cannot be combined with any other coupon.

Supplies:

Lots of Pumpkins Stencil


Lots of Pumpkins Stencil


Affiliate Links have been added but of course no extra charge to you. 

I appreciate your support.  It means a lot.


Wednesday, August 30, 2023

Fall cards using Woodblock Stamps

 Hi everyone.  I have 2 Fall cards today.  Can you tell I'm ready for Fall? I decided to make these cards using some woodblock stamps for Woodblock Wednesday that starts today hosted by my friend Amy Tsuruta


For my cards today I used some woodblock stamps that my Mom had bought me years ago.  It's a set of leaves, apple, pumpkin, and sentiments.  I love the set.  I started out with white cardstock 4 x 5.25 panel and stamped the leaves stamp with Catherine Pooler Mandarin Spice ink.  I liked how it looked as borders across my page.  I then took a blending brush and ink blended some Mandarin Spice all over my panel.


Next, I spritzed my panel with water and placed it into a embossing folder from Simon Says Stamp called Pinpoint Starlets. I love the texture. I then glued my panel to a A2 card base.  I stamped a sentiment from one the woodblocks in the set with black ink on white cardstock.  I then cut it to layer on some cardstock I ink blended with mandarin spice ink.  I glued them to my card and added some sequins to match.


On my second card, I also used the leaves woodblock stamp.  I chose not to stamp the whole panel this time.  I used Catherine Pooler Eucalyptus ink for this one.  


I also spritzed my panel with water and placed it in the same embossing folder but I made sure not to emboss the whole panel.  I then ink blended some Eucalyptus ink onto my panel.  I think it makes two different looks compared to my other card that I ink blended before going in the embossing folder with water. I ink blended some cardstock with eucalyptus ink and layered a different sentiment I had stamped from the woodblock stamps.  My panel was then glued to a A2 card base.  I added some sequins to match.  That finishes my 2 cards today.  I hope you like them.  I had fun making them.  Which card do you like better?

Supplies:

Catherine Pooler Mandarin Spice ink cube

Catherine Pooler Eucalyptus ink cube

Simon Says Stamp Pinpoint Embossing Folder


Affiliate Links have been added but of course no extra charge to you. 

I appreciate your support.  It means a lot.


Monday, August 28, 2023

Fall inspired Leaf Cards

 Hello everyone.  I made some Fall inspired Leaf Cards.  I was inspired by a Background die by Altenew that is new to me and had been in my stash for awhile now ready to get used.  It's so hard to believe we are almost in September.  Oh my gosh these days go by way too fast.


Here are my Fall inspired cards.


This is the first card I made.  I started out with a yellow cardstock and ink blended it with Distress inks in Mustard Seed Oxide, Ripe Persimmon Oxide, and Peeled Paint.  I inked them diagonally first and then I ink blended the corners.  These are my favorite colors for Fall.  I then splattered some gold paint from my Gansai Tambi starry colors with a fan paint brush. I then used an Altenew Zero Waste Leaf Pattern Die.  I cut out my background and it cut out everything including all the leaves and circles.  

I cut my negative background with my paper trimmer to be A2 size and glued it to a gray A2 card base.  I started putting some leaves and circles back into the negative background with foam tape and liquid glue.  I also used the Altenew Zero waste leaf die with a light brown cardstock and glued some of those leaves and circles back in place.   I ink blended some areas with Vintage Photo distress ink.   I added a sentiment from Simon Says Stamp stamp and die called etched greetings with foam tape.  I then glued some leaf and sequin embellishments.


And for my second card I glued the negative background that I cut earlier for my first card and glued it to a white A2 card base.  I glued in leaves left over from my first card and from the light brown cardstock  that I had die cut with liquid glue and foam tape.  I glued some circles back in too.  It's a nice die to own. I also ink blended with Vintage Photo Distress ink on my card like my first card.  I glued a sentiment with foam tape to my card from the same stamp and die set from Simon Says stamp.  I used fall color sequins and that finishes this card.  I hope you like my cards for today. I had fun making them.

Supplies:

Simon Says Stamp Etched Greetings

Altenew Zero Waste Leaf Pattern

Gansai Tambi Starry Colors

Affiliate Links have been added but of course no extra charge to you. 

I appreciate your support.  It means a lot.


Another Holiday Card for {BYSHC} Sketch #72

 Hello everyone I have another Holiday card for {BYSHC} Card Sketch 72 .  Lawn Fawn is our sponsor this month yay. This is such a fun card s...