Monday, July 21, 2025

{BYSHC} Christmas in July Linky Party Day 4

Hello I have another Holiday card for Day 4 of the {BYSHC} Christmas in July Linky Party.  All projects must be Christmas, Hanukkah, Yuletide, wintry, etc.  Entries are not required to use products from our Sponsors to be eligible for a prize.  When linking up, please use your name only in the caption box as the title of your entry.  Please use the graphic and hashtag #christmasinjuly2025byshclp in your social media posts. 


Without further ado here is my card


I have a fun Grinch Holiday card today.  I used Sponsor A Colorful Life Designs.  I used 3 stencils on this one.  Use VonFan10 to save.  I used Stink Stank Stunk 6x9 Stencil and I made a background using "Merry Grinchmas" with Concord and 9th Poppy ink on a 4 1/4 x 5 1/2 panel.  As for the Grinch face I used Grinch Season 6x6 stencil with Catherine Pooler Eucalyptus ink and fussy cut the Grinch's face.  The sentiment is also fussy cut and with Eucalyptus ink from Extra Grinchy 6x6 Stencil  You can get the Master Creator on sale of this Grinch Collection here. (Master Creators can not be used with other codes as they are already on sale)


I glued my panel to a A2 card base and I popped up my Grinch and sentiment with Sponsor Therm O Web foam tape.  I added some Hologram green card bling for fun.  That finishes this card and it would be easy and fun to batch a bunch of these cards. 
 I will be back with another Holiday card.  Happy Crafting


Here is a List of Our Amazing Sponsors:


Tawny Owl Paperie 

Fresh and Renewed with Teresa 

Angie Blom Digital Designs 

Jaded Blossom 

Not 2 Shabby 

Therm O Web 

Gina K. Designs 

Unity Stamp Co.

Lawn Fawn

RAM Stamps 

Taylored Expressions 

The Greeting Farm {NEW!!} 

Creative Worship Stamps 

Gina Marie Designs 

Newton's Nook Designs 

Pink & Main 

Markers, Ink & Paper ~ Cathy Preissing 

Digi Doodle Studios {NEW!!}  

Kraftin' Kimmie Stamps {NEW!!} 

Club Scrap 

Twiddler's Nook 

Crafty Stamp Co. {NEW!!} 

A Colorful Life Designs 


Saturday, July 19, 2025

Inspired By... Emojis

 Hello everyone.  I have a card today for the Inspired by... Emojis Challenge.  This was a fun challenge to do and I'm so glad I could participate.  Without further ado here is my card.


I was inspired by the photo and sketch.  If you know me then you know I use emojis all the time especially to thank someone.  I did not own any emoji dies though but I was able to make some emojis using what I have in my craft room. YAY.  

So I used a old Martha Stewart circle paper punch.  I paper punched 5 circles just like the sketch with yellow cardstock 85 pounds.  I ink blended the edges with Fossilized Amber Distress Oxide ink and the pink cheeks with Worn Lipstick Distress Oxide ink.  So much fun.  


I cut out some faces with Lawn Fawn Make Me Smile Dies using black cardstock 85 pounds. The small hearts are from Lawn Fawn Hearts and Stars Skinny Tag Die. I used red faux Christmas glitter pattern paper from Kat Scrappiness. I found some Birthday stickers from Michaels in my stash so I used the party hat and sentiment letters and word stickers.  Everything was glued to a 4 x 5 1/4 white panel cardstock 110 pounds and then glued to a gray A2 4 1/4 x 5 1/2 card base 110 pounds.  I had so much fun making this card.  It makes me smile.  How about you?  I hope I inspired you to use what is in your stash.  I will be back soon with another Blog Post.


Compensated affiliate links used when available. If you place an order after clicking on one of my links, I will receive a small commission at no cost to you. Thank you for your support!


{BYSHC} Christmas in July Linky Party Day 2

 Hello my friends.  It's Day 2 of the {BYSHC} Christmas in July Linky Party and I have a Holiday card to share.  We have so many New Sponsors and Fabulous Returning Sponsors for this Linky Party.  So great.  All projects must be Christmas, Hanukkah, Yuletide, wintry, etc.  Entries are not required to use products from our Sponsors to be eligible for a prize.  When linking up, please use your name only in the caption box as the title of your entry.  Please use the graphic and hashtag #christmasinjuly2025byshclp in your social media posts. 

 Without further ado here is my card:


On my card today I used the Amazing returning Sponsor Angie Blom Digital Designs.  I just purchased the Digital A Christmas Season With Piglet Kit. Isn't it cute??  She has a cute Pooh kit too.  I love how Angie Blom has her files sized for a easy download.  I printed this image on Neenah Desert Storm 80 pounds.  I colored it in with my Copic Markers.  I used returning Sponsor Gina K Designs rectangle die from Master Layouts 1 to cut my image.


I used this fun faux glitter pattern paper from returning sponsor Pink & Main from the retired Warm Wishes Paper Pad 6x6. I love it.  I glued everything to a A2 card base 4 1/4 x 5 1/2 with a Jumbo Glue Tube from returning Sponsor Lawn Fawn.  I used my white gel pen and Diamond Stickles on Pooh's sweater for fun.  I love how this card came out.  

I hope you'll join us for some Holiday fun this week.

Here is a List of Our Amazing Sponsors:


Tawny Owl Paperie 

Fresh and Renewed with Teresa 

Angie Blom Digital Designs 

Jaded Blossom 

Not 2 Shabby 

Therm O Web 

Gina K. Designs 

Unity Stamp Co.

Lawn Fawn

RAM Stamps 

Taylored Expressions 

The Greeting Farm {NEW!!} 

Creative Worship Stamps 

Gina Marie Designs 

Newton's Nook Designs 

Pink & Main 

Markers, Ink & Paper ~ Cathy Preissing 

Digi Doodle Studios {NEW!!}  

Kraftin' Kimmie Stamps {NEW!!} 

Club Scrap 

Twiddler's Nook 

Crafty Stamp Co. {NEW!!} 

A Colorful Life Designs 


Some links may be affiliate links at no extra cost to you


Friday, July 18, 2025

Build Your Stash Holiday Cardmakers Christmas In July Linky Party 2025 Day 1

 Hello I'm so excited for our Annual Build Your Stash Holiday Cardmakers {BYSHC} Christmas in July Linky Party.  I'm so excited to see your Holiday cards so use hashtag #christmasinjuly2025byshclp Cards must be Holiday, Christmas, Winter, Yuletide, etc. Without further ado here is my card.


On my first card, I used a lot of AMAZING sponsors for this card. We also have some New Sponsors yay.  I love this digital stamp called Santa's Little Baker from Sponsor Not 2 Shabby and she's free so enjoy.  I printed her and used my Brother Scan N Cut to cut her out.  She was then colored with Copic Markers.  Next, I used Sponsor A Colorful Life Designs Layered Gingerbread Men stencil (Use VonFan10 to save)on a A2 panel 4 1/4 x 5 1/2.  You get 2 stencils the cookies and the face with buttons so fun use VonFan10 to save. Next, I used Sponsor Lawn Fawn Doe ink for the Gingerbread Men cookies cookies and black and red inks for the buttons and face.


I used Sponsor Jaded Blossom for the Rounded Tag Die and Sponsor Therm o web for the Jumbo Roll Foam Tape.  I also use a Lawn Fawn STAMPtember stamp set collab. with Simon Says Stamp for the sentiment with red ink.  I added a crinkle ribbon and added everything to a A2 card base 4 1/4 x 5 1/2.  Lastly, I added some Hologram green card bling from Sponsor A Colorful Life Designs.

Here is my second card that I created for Creative Worship Stamps as they are one of our lovely returning Sponsors.


I used Cheerful Snowmen Stamp. I stamped the Snowman in Memento tuxedo ink.  I loved embossing the snowflakes and ink blending with Seedless preserves Distress Oxide ink.  I colored with Copic Markers V05, RV55, C1, E00, YR000, R11, W0, E31, and E55.  I used some Diamond Stickles for the snowflakes for fun.


My panel was cut and matted on black cardstock 4 1/4 x 5 1/2.  I then glued to a A2 card base 4 1/4 x 5 1/2.  I added some white gel pen accents and this card is done.  I had so much fun with it.

This is my 3rd card that I created also for the Creative Worship Stamps Hop.  Hop along with us on IG for a chance to win a $25 GC. to their store.


I also used the Cheerful Snowmen Stamp.  I stamped this snowman in Memento London Fog ink.  I loved the gray look.  I colored also with my Copic Markers. I ink blended my cardstock with Lost Shadow Distress ink. Next, I fussy cut it out and I used 3 different gray inks for the snowflakes.  Pumice Stone Distress Oxide ink, Lost Shadow Distress ink, and Hickory Smoke Distress Oxide ink.  I cut out some snowdrifts and stamped a sentiment with London Fog ink.


I cut my background down and popped up my snowman.  I then glued my panel to a gray A2 card base 4 1/4 x 5 1/2.  Yay I'm so happy with my Snowmen cards.


I hope you'll join us for our {BYSHC} Linky Party.  You have 1 week, it will end July 25th.

Here is a list of our Amazing Sponsors:

Tawny Owl Paperie 
Fresh and Renewed with Teresa 
Angie Blom Digital Designs 
Jaded Blossom 
Not 2 Shabby 
Therm O Web 
Gina K. Designs 
Unity Stamp Co.
Lawn Fawn
RAM Stamps 
Taylored Expressions 
The Greeting Farm {NEW!!} 
Creative Worship Stamps 
Gina Marie Designs 
Newton's Nook Designs 
Pink & Main 
Markers, Ink & Paper ~ Cathy Preissing 
Digi Doodle Studios {NEW!!}  
Kraftin' Kimmie Stamps {NEW!!} 
Club Scrap 
Twiddler's Nook 
Crafty Stamp Co. {NEW!!} 
A Colorful Life Designs 


Wednesday, July 16, 2025

The Color Hues Challenge #114

 Hello everyone.  I'm so honored to be Guest Designing for The Color Hues Challenge #114 Yellow and Green.  I love these colors and I honestly had a hard time with what to choose which is a great problem to have.  Color challenges are so much fun. Without further ado here is my card.


So It was actually a fun and tough decision on what to use as yellow and green can be used for a lot. I did decide on this fun New to me embossing folder and cutting die set from Simon Says Stamp called Alstroemeria Bunch.  I ran the embossing folder with Cilantro cardstock 4 1/4 x 5 1/2 from Lawn Fawn through my Spellbinders diecutting machine using the appropriate plates.  I then did the same with white cardstock.  I ink blended the green embossed panel with some Mowed lawn Distress Oxide ink.  I used the die and cut out the flower from the white embossed panel.  Luckily it was okay doing it that way because usually I cut first and than emboss. Anywho.


I then put my flower back into place on the white panel and ink blended it with Mowed Lawn and Squeezed Lemonade Distress Oxide inks.  I cut my green embossed panel down and I found some We R Memory keepers pattern paper in my stash that was yellow and green..Yess.  I cut that paper to be 4 1/4 x 5 1/2.  


Next, I glued my pattern paper to a A2 Neenah cardstock Solar White 110 pounds and popped up my green embossed panel with foam that has no adhesive and I just apply liquid glue to.  I then cut down my flower cutting the stem and popped it up onto my panel with foam tape.  I did use Copic markers for some interest on my flower and embossed background with G14 and Y15.  My gold foiled sentiment strip comes from a retired Essentials By Ellen foiled plate and coordinating die set.  I was happy to have this strip in my stash. I applied it with a foam strip and embellished with some yellow sequins. That finishes this card.  I hope you'll join us for this fun challenge.  

I had so much FUN creating this card and being a Guest Designer for the Color Hues Challenge.  Thank you to Nancy, Steph, and Team.  Hugs.


Supplies:


Compensated affiliate links used when available. If you place an order after clicking on one of my links, I will receive a small commission at no cost to you. Thank you for your support!


Tuesday, July 15, 2025

Cheers!

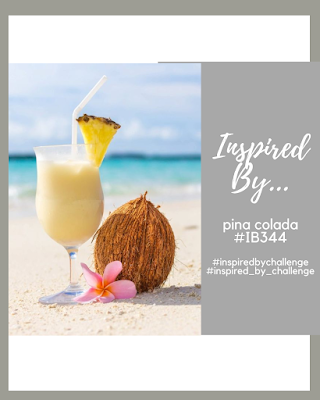
Hello I have a card today for the current Inspired By Challenge...Pina Colada #1B334.  I was inspired by the photo theme, and sketch. So much fun! Without further ado here is my card.


Well here is a look at my creative process


I love the Tropical Vibes lately and I had to participate in this challenge.  Of course I got out a few products and I ended up using Lawn Fawn Build-A-Drink Cocktail Add-On Die Set.  I also used some tropical rub ons from my stash that I rubbed on with a popsicle stick.  It was a lot of fun.  I used a panel smaller than A2 size in yellow cardstock.  It actually fell on the ground as I was looking for other papers..screaming pick me.  So I did.  I cut some white cardstock like the sketch and rubbed those tropical transfers on those pieces.  I then began to make my tropical Pina Colada shaker. I personally do not like the drink but I think it's pretty.  I used maybe 5 layers of white die-cuts of my glass.  I cut out the top layer with white glitter cardstock and glued it to some acetate packaging.  I cut out some greenery with white cardstock and colored it with a green marker.  I also cut out the cherry and stem and colored them also.


Next, I used a word sentiment from a Trinity Stamps bottle gift tag die set that also has a shadow that I cut out with pink cardstock.  I used a sprinkle mix from my stash that has some yellow, gold, and lemon clay pieces for fun.  I glued everything to a A2 card base 4 1/4 x 5 1/2 and that finishes my card.  I had a lot of fun making this card and I'm so happy I was able to join this challenge.

Hugs!!🩷


Supplies:


Affiliate Links have been added but of course no extra charge to you.  


Monday, July 14, 2025

Mid Month Inspiration with A Colorful Life Designs

 Hello everyone.  I'm so excited about this month's Mid Inspiration for A Colorful Life Designs.  In case you are not sure what Mid Month Motivation is? It's a New Stencil on Sale for only a few days and you can use my code VonFan10 to save even more on it.  So fun right?  Without further ado here is my card.


This New Mid Month Inspiration Stencil is called Mid Century Mask 6x9 Stencil.  I love this cool design.  I made a Birthday card with it.  I used white cardstock and ink blended this stencil with Hero Hues Core ink from Hero Arts in Moss and Peony inks.  I did use Pixie Spray since this is a very delicate stencil.  You can also try magnets or a strong non tearing tape.  I then cut out my background using a stitched rectangle die from retired Lil Inker Designs.


The cake image and sentiment is from MFT Stamps called All The Cupcakes.  I stamped with Memento Tuxedo ink and colored with my Copic Markers RV000, Y11, Y02, Y15, YG41. I then fussy cut my image leaving a white border.  I then glued my background to a green A2 card base 4 1/4 x 5 1/2.  I popped up my cake and stamped my sentiment.  I embellished with some pink card bling in Satin Matte Light Pink.  And that finishes my card.  I love how it came out and I hope you grab this stencil on sale.

Dont' forget to check out the New Release here


Inspired by...Coffee Mugs #IB408

 Hello I'm so excited for the Inspired by...Blog Challenge this week. Guess what the theme is??? It's Coffee Mugs#IB408 and you know...