Monday, April 1, 2024

BYSHC New Sketch 44 Challenge for April 2024

 Hello everyone.  I can't believe it's April.  I'm excited about the New BYSHC Sketch 44 Challenge.  Yay it's another fun one.  It will help get your Holiday cards ready earlier and RAM Stamps is our sponsor.


This sketch is so fun. These Santa Hats are fun too.  I used A Colorful Life Designs Layered Santa Hats Stencil for my background. (use VonFan10 to save 10%)  I used inks Lumberjack Plaid Distress ink for the red and Lost Shadow Distress ink for the white.  I then cut my background according to the sketch and layered it on some pattern paper.  


I stamped a sentiment using a stamp from my stash and glued everything to a A2 card base.  I jope you like my card.  It was so much fun to make.  It's a really great sketch.  I hope you'll be joining us this month.  Just add your card to our Build Your Stash Holiday Cardmakers FB group in the correct album to participate. 

Supplies:


Affiliate Links have been added but of course no extra charge to you.  

I appreciate your support.  It means a lot.


A Colorful Life Designs New April 2024 Release

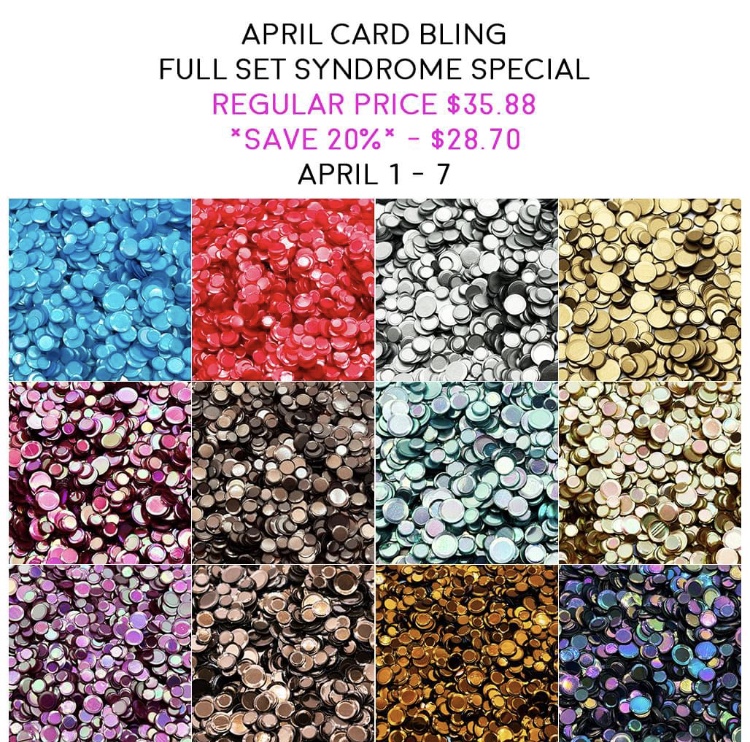
 Hello everyone.  Happy April.  I have a card today using 2 New Stencils from A Colorful Life Designs New April Release.  There is also New Card Bling and its on sale for the full set for a limited time.  This release is so much fun because there are some sassy sayings Stencils too.  Use VonFan10 to save 10% off your purchases.

Master Creator Geometric Bundle


I used the New Four Angles Stencil on white cardstock with Hero Arts Charcoal ink.  I think it's really a fun stencil.  I cut my background to 4 x 5 1/4.  I then ink blended the New Fun Eye Rolling stencil with Catherine Pooler Samba ink.


I cut a square out with white cardstock using a craft die.  I then used the Eye Rolling Stencil and ink blended another Sassy Saying onto my square die-cut with Catherine Pooler Samba ink.  I glued my 4 x 51/4 panel to a A2 card base.  I adhered my square die-cut with foam tape and embellished my card with Doodles Paper Playground.  I hope you like my card, it was a lot of fun.  Check out the New Release here.

Thank you for visiting my blog

Supplies:


Affiliate Links have been added but of course no extra charge to you.  

I appreciate your support.  It means a lot.


Friday, March 29, 2024

Layered Bunny Faces Slimline Card

 Hello everyone.  I have my last Easter card to share, so Happy Easter.  I was wanting to make a Slimline card.  It's a funny felling, like a craving.  At least it's calorie Free right?? 


I started out with white cardstock.  I used the Layered Bunny Faces Stencils from A Colorful Life Designs. It's such a cute stencil set. Use VonFan10 to save 10% off off at A Colorful Life Designs.  For stencil #1 I used Concord & 9th Sea Glass ink cube with a blending brush for the bunny heads.  I then used for stencil #2 Hero Arts Cup O Joe ink cube.  Using this color combo I wanted Mint N Chip ice Cream.  It was very easy to layer my stencil for a Slimline.  I cut out my background using a Slimline die from Honey Bee Stamps.  It cuts out a eyelet frame and inner rectangle.


I glued my slimline panel and eyelet frame to a kraft card base.  I then cut out a Easter word from Simon says Stamp out of kraft cardstock 2 times.  I also ink blended it after I glued it together with Hero Arts Cup O Joe ink cube.  I glued it to my card.  I also cut out a bunny face from the Simon says Stamp peeking Bunny die with white cardstock and I ink blended it to match.  I stamped a Hoppy sentiment from Simon Says Stamp Hoppy Days stamp with black ink.  I cut the sentiment and added it with foam tape to my card.  


I used a pink marker and added cheeks to my stenciled bunnies and die-cut bunny using a pink marker.  Lastly, I added some sequins from Doodles Paper Playground in Broken Glass.  I hope you like my bunny card.  I had so much fun making it.

Thank you for stopping by ðŸ’š

Supplies:


Affiliate Links have been added but of course no extra charge to you.  

I appreciate your support.  It means a lot.


Wednesday, March 27, 2024

Wishing You Everything Happy

 Hello everyone! It's Woodblock Wednesday  I love this challenge, it's a fun way to give your Woodblock stamps some love. This challenge is hosted my my friend Amy Tsuruta.  I hope you can participate, it's really fun.  Usually you have until the following Monday to upload your cards.


On my card, I used this cute camper woodblock stamp from American crafts that was in my stash waiting to get inked.  I stamped it on white cardstock with black ink and colored it simply with my copic markers.  I then cut it out with a scalloped stitched rectangle craft die from Waffle Flower Crafts.  The pattern paper is from Echo Park called Imagine That Girl 6x6 paper pad.  I cut a rectangle and layered my camper.  I also cut pattern paper to glue to my white cardstock panel 4 x 5 1/4 as well as a strip.  


I stamped one of my all time favorite sentiments using the Woodblock stamp from Michaels Recollections with black ink onto my white panel.  I then glued everything with liquid glue.  I used my white gel pen for a few accents and glued some sequins to match.  Everything was glued to a kraft A2 card base.  I hope you like it.  I had a lot of fun making it.


Thank You for Visiting My Blog 💗


Sunday, March 24, 2024

Easter Card Using The Greetery

Hello everyone.  I have another Easter card to share with you.  I think I better start mailing some Easter Cards real soon or they might be late.  I hope you can relate. Easter cards are so much fun to make.


I first started out with cutting out the carrots and greenery craft dies from The Greetery with orange and green colored cardstock.  I then ink blended them with Carved Pumpkin Distress Oxide ink for my carrots and Peeled paint Distress ink for the greenery.  I also cut out the Spring word die from The Greetery with white cardstock 4 times.  I glued them together for dimension.


It's a little difficult to see the wax seal in the photo but its a bunny with eggs and greenery.  I made some wax seals playing with wax.  This one has was made with gold and iridescent wax.  They are fun and addicting to make.  Next, I glued the greenery to my carrots.  I glued my carrots together with one popped up on top.


Here is a close up of the Wax Seal


I cut out a nested shaped die from Spellbinders Advent Calendar 2023 with pattern paper from Pink Paislee Bella Rouge 6x6 paper pad as well as a A2 rectangle.  I thought these patterns were fun.  I ink blended the nested shape with Carved Pumpkin Distress Oxide ink.  I glued everything to a A2 card base and I tied some hemp twine before adding my was Stamp.  I hope you like my card, It was so much fun.  I wish I had made 2 cards, oh well next time.

Thank you for visiting my blog 

Supplies:


Friday, March 22, 2024

Sketch 43 BYSHC Holiday Card

 Hello everyone.  I'm so excited to have another sketch holiday card using BYSHC Sketch 43.  I think this sketch is amazing and easy to work with.  I hope you'll join us, you still have time to make a Holiday using sketch 43 and uploading it to the Build Your Own Stash Holiday Cardmaking FB Group.  There is a prize too and our sponsor this month is Twiddlers Nook.  Winner's Choice - a $20 gift card to Twiddler's Nook OR a Christmas themed prize package curated by Amanda!!  So Amazing I love Amanda's store and her prize packages.


I first cut some holiday pattern paper from my stash according to the sketch.  I used a circle die too.  I love this sketch and chose to use a simple cute Birthday Deer image from Lawn Fawn.   I stamped the reindeer and cupcake on white cardstock with black ink and colored them in with my alcohol markers and then cut it out with the coordinating die.


I glued everything to a A2 side folding card base.  I used a sentiment strip from my stash that is from Taylored Expressions.  I hope you like it.  You have until March 31 to add your card to the album and Please share on Social Media I would love to see your cards.

Thank you for visiting my blog♡


Wednesday, March 20, 2024

You're So Eggstra

Hello everyone.  Happy Spring! I have a Easter card for you today.  I shopped my stash and used some retired Easter products.  It's nice when you can shop your stash.  


I first started off with white cardstock.  I cut out some eggs from a Reverse Confetti Egg Carton die set.  I was happy to grab this set before they closed last year.  I cut out the egg carton which has 2 pieces with purple cardstock. I then ink blended the eggs with Squeezed Lemonade Distress Oxide ink, Picked Raspberry Distress Oxide ink, Wilted Violet Distress ink, Spiced Marmalade Distress Oxide ink, Mowed Lawn Distress oxide ink, and Uncharted Distress ink.  I ink blended my egg carton a little bit with Wilted Violet Distress ink.  I then glued my eggs in the egg carton.


For my background, I cut out some white cardstock 4 x 5 1/4.  I used a retired Taylored Expressions Eggceptional rubber background stamp.  I inked it up with black ink and laid my cardstock on top.  I pressed all over and then lifted my cardstock.  I then used the retired coordinating stencil and laid my stencil over my cardstock.  I used the same Distress inks and ink blended the stamped eggs.  I love how it came out.  


I glued my background panel to a A2 top folding card base.  I adhered my eggs and egg carton with foam tape.  I stamped a sentiment also from Reverse Confetti on white cardstock with black ink.  I cut my sentiment in half and added foam tape to the back before adding them to my card.  I embellished with some clear sequins from Lucy's Things. I also added some white acrylic paint splatters.  I hope you like my card.  It was a lot of fun.  I love that sentiment.  Aren't we all Eggstra?

I hope you subscribe to my Youtube channel Vonmariedesign as I will be doing a giveaway soon.

Thank you for visiting my blog💖


{BYSHC} Christmas in July 2026 Linky Party Day 8

 Hello everyone Today's the last day for the {BYSHC} Christmas in July 2026 . I have had so much fun this week and I really enjoyed seei...