Friday, February 9, 2024

Filigree Shamrock-Happy St. Patrick's day

 Hello everyone.  I have a St. Patrick's Day card to share using the New Filigree Shamrock Stencil from A Colorful Life Designs Newest Release.  If shopping use my code VonFan10 to save 10% off your purchase.


On my card, I started out with white cardstock.  I used the Beautiful New Filigree Stencil with retired Wplus9 Old Gold ink.  Any gold ink will do.  I cut my background to a A2 size using my paper trimmer.  I then inked around my shamrock with the same Old Gold ink.  


I used a sentiment from the Lawn Fawn Celebration Sentiments stamp set and stamped it with black ink onto my A2 background panel.  I then glued my panel to a A2 top folding card base.  I embellished my card with some gold card bling from A Colorful Life Designs.  I hope you check out the New release.

Supplies:


Affiliate Links have been added but of course no extra charge to you.  

I appreciate your support.  It means a lot.


Wednesday, February 7, 2024

Layered Bees and Hexagons Birthday Card

 Hello everyone.  I have a card today using Bees.  Yes Bees.  The New Layered Bees Stencil is amazing and Marvelous Masks Hexagon stencils from A Colorful Life Designs February Release.  Use VonFan10 to save 10% off your purchase.


The Marvelous Masks Hexagon Stencils include Set A that has 5", 4", 3", 2" and Set B that has 5.5", 4.5", 3.5" 2.5". I think you need both sets.  The Layered Bees Stencils include 3 stencils.

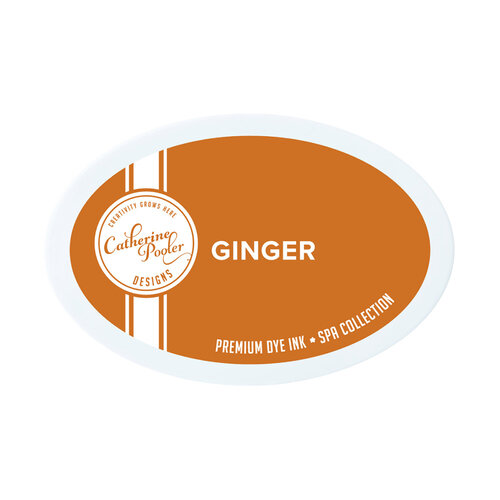
I used white cardstock and set A and B Marvelous Masks Hexagons stencils. I used Catherine Pooler Catching Rays ink and Catherine Pooler Ginger ink.  I also used the masks included to acheive both hexagons layered.


I then used Lawn Fawn Moonstone ink to blend around my hexagons.  Next, I used the Layered Bees Stencils.  Stencil 1 with Black ink, stencil 2 with Catherine Pooler Catching Rays ink, and Stencil 3 with Lawn Fawn Moonstone ink.  I cut out my background with a A2 stitched Rectangle die.  I stamped my sentiment from Lawn Fawn Hive Five Stamp with black ink.  I cut it to a strip and adhered with foam tape.  I glued my background panel to a A2 card base and glued some black glossy card bling from A Colorful Life Designs.  I hope you like my card. 

 I will also be linking my card to the Simon Says Stamp Monday Challenge-Fun With Stencils.

Thank you for visiting my blogπŸ’›

Supplies:

Layered Bees Stencil


Marvelous Masks Hexagon Stencil


Lawn Fawn High Five Stamp


Catherine Pooler Catching Rays ink


Affiliate Links have been added but of course no extra charge to you.  

I appreciate your support.  It means a lot.


Tuesday, February 6, 2024

Shamrocks and Rainbows

 Hello everyone.  I have a fun card today using the New St. Paddy's Heart Stencil from A Colorful Life Designs Newest Release.  Use VonFan10 to save 10% off your purchase.


I love the New St. Paddy's Heart Stencil.  On pink heavy weight cardstock, I chose to ink blend half of the heart.  I used Rustic Wilderness Distress ink.  I then used the Rainbows Everywhere Stencil and ink blended the rainbows sporadically with Rustic Wildereness Distress ink.  I also ink blended some rainbows with Picked raspberry Distress Oxide ink.  


 I cut my background to be "4 x 5 1/4" and stamped a sentiment from Simon Says Stamp Simply Thank you stamp set with black ink.  I glued my background to a green A2 panel and glued them both to a pink A2 card base.  I added some sequins to match and that finishes this card.  I hope you like it.  Check out the Newest Release here.  I will also be linking my card to Simon Says Stamp Monday Challenge-Fun With Stencils.

Thank you for visiting my blog today, Happy Crafting! πŸ€πŸ€πŸŒˆ


Supplies:

St. Paddy's Heart Stencil


Affiliate Links have been added but of course no extra charge to you.  

I appreciate your support.  It means a lot.


Sunday, February 4, 2024

Valentine card using The Greeting Farm

 Hello everyone.  I have a card to share using the Newest Digital stamp called Sweet Treat Anya from The Greeting Farm.  I think this Anya is so cute and so I used her for my Valentine card today.


I thought Anya looked so cute carrying her Treat Box.  I almost put her on a Tag.  I printed her and some sentiments on hammer mill cardstock.  I colored her in with my alcohol markers.  I then fussy cut her out using my scissors.  She was really easy to fussy cut.  


Her Blooms in her hair reminded me of the Dramatic Blooms Stencil from A Colorful Life Designs.  It's a really pretty stencil and you can use my code VonFan10 to save 10% off.  On white cardstock, I ink blended the stencil with Picked Raspberry Distress Oxide ink and Dried Marigold Distress Oxide ink for the center.  Next, I cut my background to be A2 size "4 1/4 x 5 1/2".  I glued Anya and my background to a kraft top folding A2 card base.


Next, I cut my sentiment with my paper trimmer and adhered my sentiment with foam tape to my card.  I applied pink chalk for Anya's cheeks and added some white gel accents using my Gelly Roll pen.  Lastly, I glued purple gems and sparkle to Anya's Blooms and bow.  I hope you like my Valentine Card.  I had so much fun making this card.  I will also be linking my card to the Simon Says Stamp Wednesday Challenge-Anything Goes.

Thank you for visiting my Blog.

Supplies:


Affiliate Links have been added but of course no extra charge to you.  

I appreciate your support.  It means a lot.


Saturday, February 3, 2024

Woodblock Wednesday January 2024

 Hello everyone.  I finally was able to make a quick card for the Woodblock Wednesday Challenge hosted by my friend Amy Tsuruta.  I always love these challenges but I almost didn't make it this time...who can relate??


I chose to use these sweet Woodblock Stamps for my Mini Slimline Card.  The dog one is from Michaels that I got last year and the other is from Hero Arts that was on clearance at Joanns last year.  On yellow cardstock, I stamped and heat embossed my woodblock stamps with Versafine Onyx black ink and Hero Arts clear embossing powder.  


I colored my images with Prismacolor Colored pencils.  I then cut out my images with a Mini Slimline die from Gina K Designs.  I cut out the redish colored cardstock with a larger Gina K Designs die.  I used some residue ink from my blue brush to ink blend the top of my yellow paper and my green brush to ink blend the bottom of my yellow cardstock for fun. Next, I glued everything to a kraft mini slimline card base and added some red heart embellishments.  Lastly, I added some white gel accents with my Gelly Roll pen.  I hope you like my card, ir was so much fun.  

Thank you for visiting my blog today, I truly appreciate it.


 Supplies:


Affiliate Links have been added but of course no extra charge to you.  

I appreciate your support.  It means a lot.


Friday, February 2, 2024

Tall Flowers Stencil

 Hello everyone.  I have a card today using a Beautiful stencil from A Colorful Life Designs February Release.  Use my code VonFan10 to save 10% off your purchase.


I love the New Tall Flowers Stencil 6x8.  It's really beautiful.  Perfect for any size project.  I especially love this size for A7 cards and Slimline cards.I first sprayed my sencil with Pixie Dust Spray.  I felt it was a little fragile and I wanted to get a great blend.  On white cardstock, I ink blended the Tall Flowers stencil with Broken Chian Distress Oxide ink for my flowers.  Next, I ink blended around my flowers with Wilted Violet Distress ink.  Towards the bottom of where my stems are I used Mowed Lawn Distress oxide ink.


After I was done ink blending my Tall Flowers Stencil.  I went back with Broken China Distress Oxide ink and added some darker shading. Next, I cut my background to be A2 size and glued it to a green top folding heavy weight card base.  I used some card bling from My Colorful Life Designs and a foiled sentiment from my stash.  I hope you like my card.  

Thank you for visiting my blog today.

Supplies:

Tall Flowers Stencil 6x8


Card Bling 


Affiliate Links have been added but of course no extra charge to you.  

I appreciate your support.  It means a lot.


Thursday, February 1, 2024

A Colorful Life Designs New February Release

 Hello everyone.  I'm so excited to share a New project for A Colorful Life Designs February Release. I have a video down belowThere is St. Patricks Stencils, Spring, and layering stencils.  15 New Stencils and Card Bling.  Use VonFan10 to save 10% off your purchase.


Master Creator Bundle 20% off


On my card today, I used the New Clover Trelis Stencil.  I loved it so much for a wallpaper wall for my card.  I used white cardstock with Catherine Pooler Dress Blues ink.  I think its so pretty.  I cut my background for my A2 card.


I used a older STAMPtember stamp set with Simon Says Stamp and Newton's Nook Designs.  I already had the images stamped and cut out with my Brother Scan N Cut.  I colored the images in with my copic markers.  I was going for a Blue and White mostly color skim.  I glued everything to a A2 card base.  I stamped a sentiment from the same stamp set using the Dress Blues ink.  I cut my sentiment to fit on my card.  Lastly, I added some Card Bling from A Colorful Life Designs and white gel accents with my Gelly Roll pen.  I hope you like it and check out the New Release.  Use VonFan10 to save 10% off your purchase.  Visit the New Release here


Watch how I made this card here 


Copic markers used B02, B08, B12, C3, C5, C6, T9


Thank you for visiting my blog.πŸ’–

Supplies:

A Colorful Life Designs Clover Trellis Stencil


A Colorful Life Designs Card Bling


Affiliate Links have been added but of course no extra charge to you.  

I appreciate your support.  It means a lot.


Inspired By Ghosts #IB413

 Hello everyone. There's a New Inspired by...Blog Challenge and this week it's GhostsπŸ‘». There is a really fun inspiration photo a...